12、Go Web 编程 - 使用 bootstrap 5 美化界面
hi,我是温新,一名 PHPer
到了这篇文章,我们得为自己加一个鸡腿。因为,我们简易 Blog 已经基本完成了。
在这之前,我们一直都在做功能开发,页面简直是难以入目。如果有同感且就走在爆发的边缘了,那么,再继续忍一忍,因为接下来我们要为 Blog 换上美丽的衣服。如同即将遇到那个帅气/美丽的他/她。
现在,我们使用 bootstrap 5 来为她装扮吧。
templates/_base.html
<!doctype html>
<html lang="en">
<head>
    <meta charset="UTF-8">
    <meta name="viewport"
          content="width=device-width, user-scalable=no, initial-scale=1.0, maximum-scale=1.0, minimum-scale=1.0">
    <meta http-equiv="X-UA-Compatible" content="ie=edge">
    {{if .Title}}
    <title>Go Web 编程 - {{.Title}} - 自如初</title>
    {{ else }}
    <title>Go Web 编程 - 自如初</title>
    {{ end  }}

    <link href="https://cdn.bootcdn.net/ajax/libs/twitter-bootstrap/5.3.1/css/bootstrap.min.css" rel="stylesheet">
</head>
<body>
    <nav class="navbar navbar-expand-lg bg-body-tertiary">
        <div class="container-fluid">
            <h5 class="navbar-brand my-0 mr-md-auto font-weight-norma">Go Blog</h5>

            <div class="collapse navbar-collapse" id="navbarTogglerDemo02">
                <ul class="navbar-nav me-auto mb-2 mb-lg-0">
                    <li class="nav-item">
                        <a class="nav-link active" aria-current="page" href="/">自如初</a>
                    </li>
                    <li class="nav-item">
                        <a class="nav-link" href="/explore">广场</a>
                    </li>
                    {{if .CurrentUser}}
                    <li class="nav-item">
                        <a class="nav-link" href="/user/{{.CurrentUser}}">人个主页</a>
                    </li>
                    {{end}}
                </ul>

                <div class="d-flex">
                    {{if .CurrentUser}}
                    <a href="/logout" class="btn btn-outline-primary p-2">退出</a>
                    {{else}}
                    <a href="/login" class="btn btn-outline-primary p-2">登录</a>
                    {{end}}
                </div>

            </div>
        </div>
    </nav>


    <div class="container">
        {{template "content" .}}
    </div>

    <script src="https://cdn.bootcdn.net/ajax/libs/jquery/3.7.1/jquery.min.js"></script>
</body>
</html>
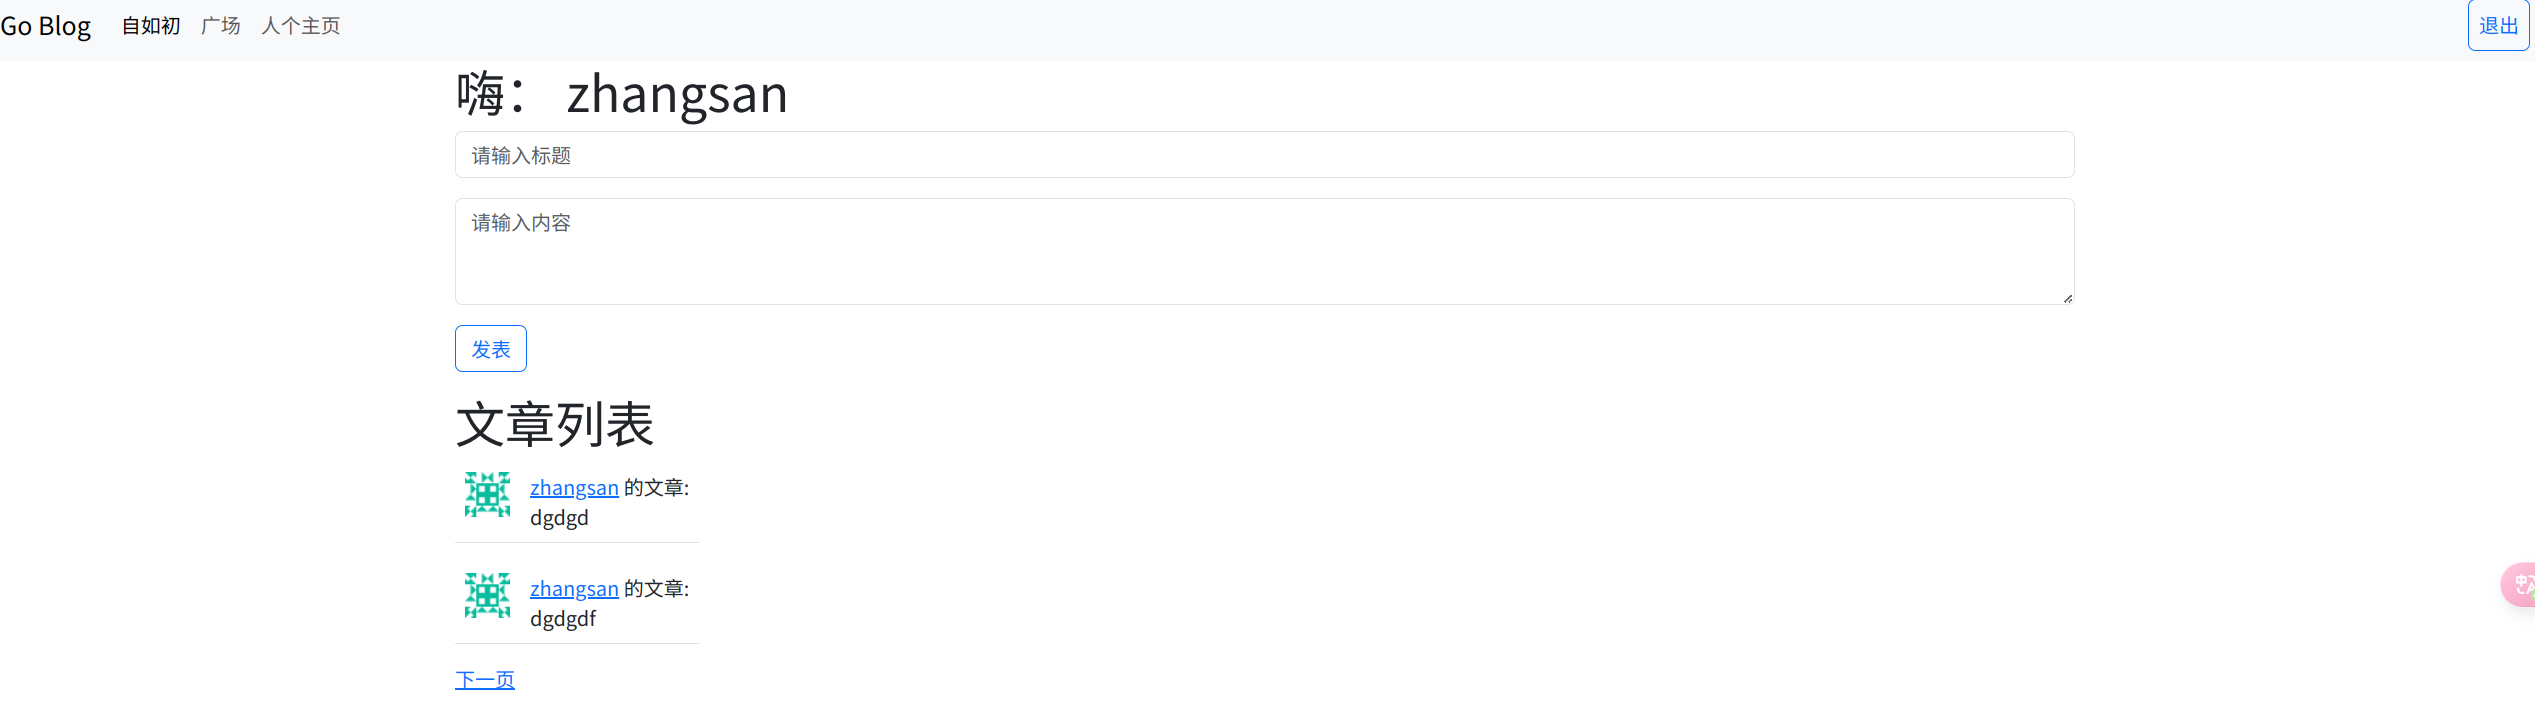
看看美化之后的样子吧
templates/profile.html
{{define "content"}}
<div>
    <table class="table d-flex">
        <tr>
            <td><img src="{{.ProfileUser.Avatar}}" alt=""></td>
            <td>
                <h1>用户名称: {{.ProfileUser.Username}}</h1>

                {{if .ProfileUser.AboutMe}}
                <p>{{.ProfileUser.AboutMe}}</p>
                {{end}}
                {{if .ProfileUser.LastSeen}}
                <p>最后登录时间:{{.ProfileUser.LastSeen}}</p>
                {{end}}
                <p>{{ .FollowersCount }} 关注, {{ .FollowingCount }} 关注中.</p>
                {{if .Editable}}
                <p><a href="/profile_edit">编辑</a></p>
                {{else}}
                {{if .IsFollow}}
                <p><a href="/unfollow/{{.ProfileUser.Username}}">取消关注</a></p>
                {{else}}
                <p><a href="/follow/{{.ProfileUser.Username}}">关注</a></p>
                {{end}}
                {{end}}
            </td>
        </tr>
    </table>
    <nav aria-label="...">
    {{ if gt .PrevPage 0 }}
    <a href="/user/{{.ProfileUser.Username}}?page={{.PrevPage}}">上一页</a>
    {{ end }}
    {{ if gt .NextPage 0 }}
    <a href="/user/{{.ProfileUser.Username}}?page={{.NextPage}}">下一页</a>
    {{ end }}
    </nav>
</div>

<div>
    {{range .Posts}}
    <p>
        {{ .UserInfo.Username }} 的文章: <b>{{ .Title }}</b>
    </p>
    {{end}}
</div>
{{end}}
美化之后的样子
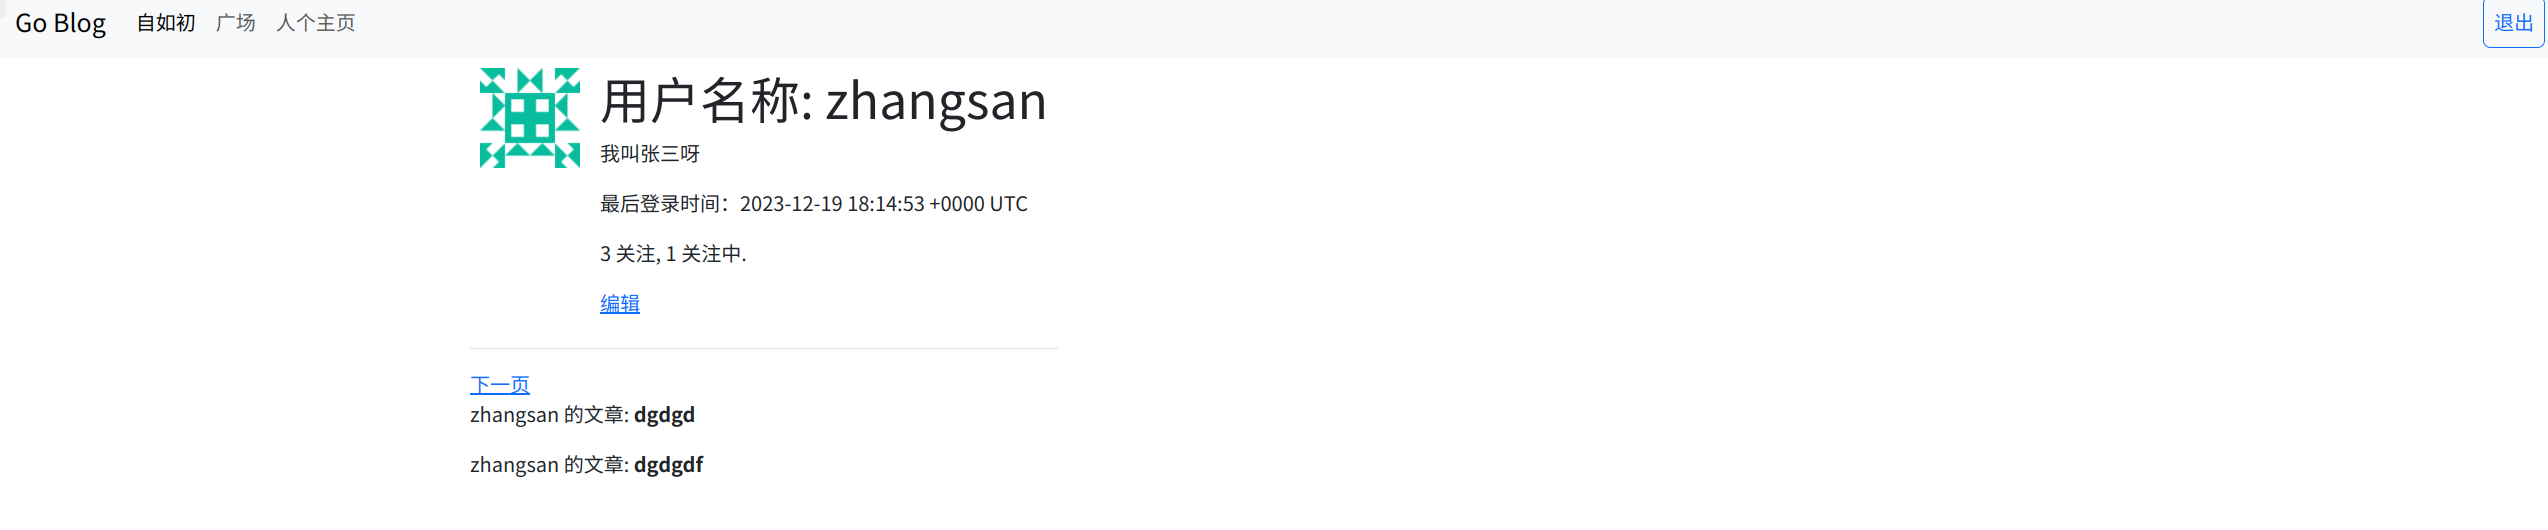
美化之后,心情也是美美的。
关于其他页面,这里就不展示了,可以自己动手美化成自己想要的样子。也可以参考本系列源码。
请登录后再评论